
Forget chasing names or panicking during runs. Winning your Campus to Canton (C2C) draft isn’t about having the best rankings; it’s about understanding value clusters and exploiting the gaps between them. Tier-based drafting is your strategic blueprint, transforming a chaotic draft into a controlled conquest. Here’s how to wield tiers using the 2025 landscape as our playbook.
Building Your 2025 Tiers (Sample Framework)
Quarterback (QB)
- Tier 1 (Elite Ceiling): Bryce Underwood, Keelon Russell
- Dropoff Point: Massive. Missing these means settling for significantly lower weekly upside.
- Tier 2 (Solid Starters): Deuce Knight, Husan Longstreet, Tavien St. Clair, Matt Zollers
- Dropoff Point: Noticeable. Tier 3 lacks the same week-winning potential.
- Tier 3 (Low-End Starter/High-End Backup): Spencer Rattler, Aaron Rodgers, Julian Lewis, Kurtis Rourke
- Dropoff Point: Significant. Tier 4 offers minimal upside.
- Tier 4 (Backups/Streamers): Jameis Winston, Bryce Baker, Kamario Taylor
- Dropoff Point: Steep cliff to waiver wire material.
Running Back (RB)
- Tier 1 (Elite Workhorses): Ousmane Kromah
- Dropoff Point: Monumental. The true difference-makers.
- Tier 2 (High-Volume Upside): Gideon Davidson, Bo Jackson, Harlem Berry
- Dropoff Point: Clear. Tier 3 introduces significant risk factors.
- Tier 3 (Risky Lead Backs/Committee): Shekai Mills-Knight, Alvin Henderson, Robert Henry, Jace Clarizio, Marquise Davis
- Dropoff Point: Major. Tier 4 offers little reliable production.
- Tier 4 (Deep Stashes/Handcuffs): Phil Mafah, Ulysses Bentley IV, Keilan Robinson, Chris Rodriguez
- Dropoff Point: Cliff to roster-fillers.
Wide Receiver (WR)
- Tier 1 (Alpha Dominance): Dakorien Moore
- Dropoff Point: Largest in the draft. Secures a massive weekly advantage.
- Tier 2 (High Ceiling WR1s): Quincy Porter, Lotzeir Brooks, Jerome Myles, Caleb Cunningham, Dallas Wilson, Talyn Taylor
- Dropoff Point: Significant. Tier 3 players lack the same elite upside consistency.
- Tier 3 (Strong WR2s): Eric Singleton, Luther Burden, Joseph Williams, Isaiah Bond, Nick Nash, Jimmy Horn, Vernell Brown
- Dropoff Point: Noticeable. Tier 4 offers lower floors.
- Tier 4 (Upside WR3/4s): Jamie Ffrench, Emmett Mosley, Marquez Valdes-Scantling, Noah Brown, Xavier Hutchinson, CJ Wiley
- Dropoff Point: Steep decline to depth pieces.
Tight End (TE)
- Tier 1 (Near-WR2 Value): Linkon Cure
- Dropoff Point: Huge. The only true positional advantage.
- Tier 2 (Proven Veterans): Evan Engram, Jake Ferguson
- Dropoff Point: Clear. Tier 3 lacks consistency.
- Tier 3 (Boom/Bust Starters): Mike Gesicki, Terrence Ferguson
- Dropoff Point: Significant. Tier 4 is streaming territory.
- Tier 4 (Depth/Streamers): Waiver Wire
- Dropoff Point: Minimal value difference within tier, steep drop after.
Strategic Application:
- Cross-Positional Value is King: Your pick isn’t “a QB” or “a WR.” It’s “a Tier 1 QB” vs. “a Tier 2 WR” vs. “the last Tier 2 RB.” Always take the player from the highest remaining tier, regardless of position. If you’re staring at the last Tier 2 QB (Knight/Longstreet/St. Clair) but Tier 3 WRs (Burden/Bond/Nash), the QB likely offers more relative value due to scarcity and the tier drop-off. Letting that QB go means settling for a Tier 3 QB later, a bigger loss than settling for a Tier 3 WR when many similar ones remain.
- Decision Point: At the 3/4 turn, Tier 2 QBs are drying up. Tier 3 WRs are plentiful. Taking Knight here is likely smarter than reaching for the next WR in Tier 3.
- Exploit Positional Runs, Don’t Chase Them: If everyone zigs (e.g., a massive RB run in rounds 2-3), you zag. A run on Tier 2/3 RBs means Tier 1/2 WRs (Moore, Porter, Brooks) or that last Tier 1 TE (Cure) might fall to you. Snag the elite talent at another position while others overpay for RBs. Their run might even trigger a WR run before your next pick, letting you grab a falling RB from the next tier (Tier 3 – Henderson/Henry) at value.
- Decision Point: Early RB run clears Tier 1 (Kromah) and Tier 2 (Davidson/Jackson). Instead of reaching for Tier 3 RB Mills-Knight, grab falling Tier 1 WR Moore or Tier 1 TE Cure. Target RB again later in Tier 3.
- Identify the Cliff (Scarcity Management): Monitor how many players are left in high tiers at each position. If only 1 Tier 2 QB remains but 8 Tier 3 WRs, the QB’s scarcity makes him more valuable now, even if a Tier 3 WR is “next” on your list. Missing that last Tier 2 QB forces you into the significantly lower Tier 3.
- Decision Point: Mid-round 5, only Tavien St. Clair (Tier 2 QB) remains. Tier 3 WRs like Burden or Bond are still abundant. Take St. Clair; a comparable WR will likely be there next round.
- “Wait on QB/TE” Defined by Tiers: This strategy isn’t dogma; it’s tier-driven. You wait until the cost of missing your target tier becomes too high. Target a specific tier of starter (e.g., Tier 2 QB, Tier 2 TE). When only 1-2 players remain in that tier and the value compared to available players at other positions makes sense (i.e., they are in a lower tier), that’s your trigger. If managers picking soon already have QBs/TEs, you might delay further.
- Decision Point: Round 8. You want a Tier 2 TE (Engram/Ferguson). Both are gone. Tier 3 TE Gesicki is available, but so is Tier 3 WR Joseph Williams. Unless TE premium, take Williams. Keep waiting on TE until Tier 3 is the last viable starter tier, then pounce if the value is right compared to other positions.
- Roster Construction by Tier:
- Early Rounds (1-4): Target Elite Anchors (Tier 1). Secure at least one cornerstone player (Moore, Kromah, Underwood/Russell). Prioritize positions with the steepest early drop-offs (WR, RB). If missing elite RB/WR, Tier 1 QB/TE becomes crucial.
- Middle Rounds (5-10): Fill Starter Tiers & Value Drops. Target the last players in Tier 2 (QB, WR, RB) and Tier 3 WRs/RBs. This is where exploiting positional runs pays off. Secure your starting QB and TE target tiers here. Prioritize positions facing imminent tier cliffs.
- Late Rounds (11+): Target Upside & Depth within Tiers. Focus on Tier 4 WRs with upside (Ffrench, Mosley), Tier 3/4 RBs with paths to relevance (Henderson, Clarizio, Mafah, Bentley), and QB/TE depth. Look for players where your projection (tier) is higher than ADP. Don’t reach; stick to the highest available tier across positions.
Tier-based drafting removes emotion and injects structure. It forces you to see the draft board in terms of value clusters and scarcity gaps. By focusing on:
- Value Clusters: Grouping players correctly.
- Identifying Cliffs: Knowing where the steepest drop-offs are.
- Cross-Positional Comparison: Always taking the highest tier available.
- Scarcity Awareness: Understanding how many players are left in your target tiers.
You transform from a reactive drafter chasing positions to a proactive strategist controlling the flow. You lead runs, you don’t follow them. You secure value, you don’t overreach. In the complex, two-roster world of C2C, mastering tiers isn’t just a tactic; it’s the foundation of building a dynasty contender. Now, study your tiers, identify your cliffs, and go control your draft.
Frequently Asked Questions
Q1: What exactly is a “tier” in C2C drafting?
A “tier” groups players of similar projected value and upside into clusters. Within each position, Tier 1 contains the true difference-makers, Tier 2 the high-ceiling starters, Tier 3 the reliable depth or committee options, and Tier 4 the streamers/handcuffs. Tiers help you see where steep value drop-offs (“cliffs”) occur and make cross-positional calls based on scarcity rather than raw rankings.
Q2: How many tiers should I build per position?
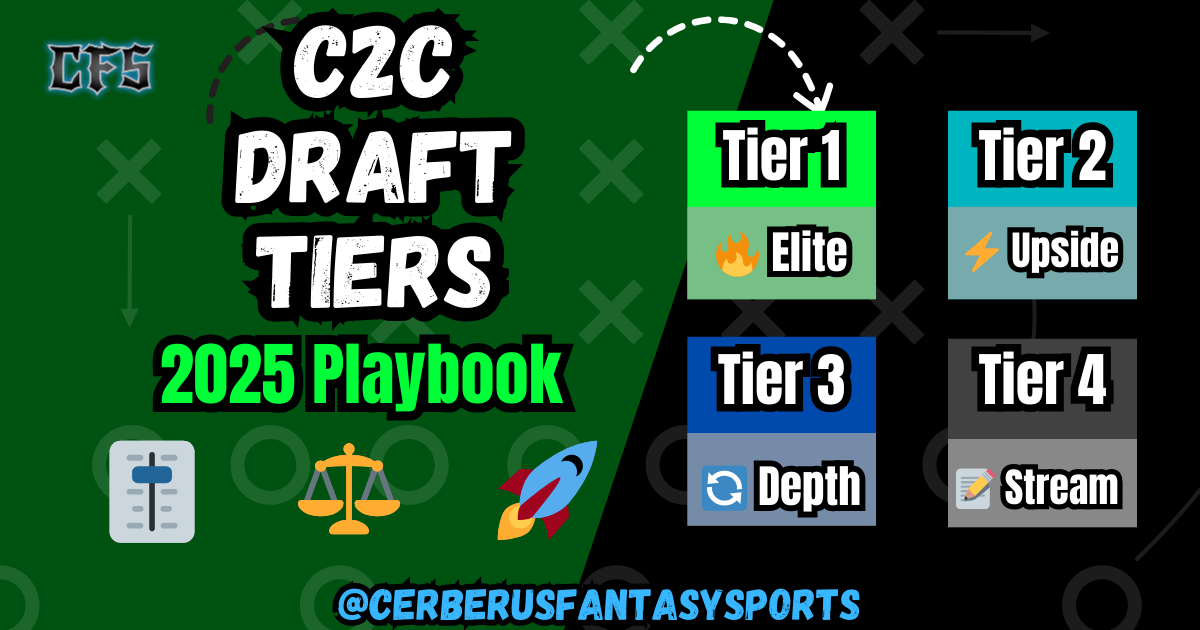
We recommend four tiers:
1. Tier 1 (Elite) – The handful of players whose weekly upside is unmatched
2. Tier 2 (Upside) – Solid starters with high ceilings
3. Tier 3 (Depth) – Low-end starters or committee backs/WR2s
4. Tier 4 (Stream/Handcuff) – Late-round fliers and waiver material
Q3: When should I deviate from taking the highest-tier player “by position”?
You always draft the highest-tier player remaining across positions—unless your roster already has depth at that position and you can’t start them. For example, if only a Tier 2 QB remains but several Tier 1 WRs are still on the board, you should grab the WR. Position need only override tier value if you truly can’t field that player.
Q4: How do I spot the “cliff” in each tier?
The “cliff” is where the drop-off in projected weekly upside is steepest. Look at ADP windows—if Tier 1 RBs go from picks 1.02 to 1.06 and the next RB isn’t until 2.03, that gap signals a cliff. Use those windows to know exactly when you must grab from a tier before its remaining players evaporate.
Q5: What if a positional run happens—do I chase it?
No—exploit it instead. If others are feverishly drafting RBs in a run on Tier 2/3 backs, you can pivot to a falling Tier 1 WR or Tier 1 TE at value. Leverage runs to grab the best remaining tier-1 or tier-2 talent at another position and return to RBs once the run subsides.
Q6: How often should I update my tiers before draft day?
Update them at least:
Two weeks before your draft (to reflect ADP shifts)
One week before (to catch camp news and injury updates)
Day before (finalize based on any last-minute reports)